So my wife and I have been trying to get ready for the new baby for quite some time.
 |
| We think the nursery is pretty much there. |
It struck us, though, that we might not have all of the time in the world to cook once she's here. So I overreacted as usual and decided to buy a deep freezer and make 2 weeks worth of food to freeze.
 |
| Got these fancy bags to ward off freezer burn. |
Most of these meals we (read: I) decided to make over one weekend. I thought I'd share my experience and a few recipes. Most of these are by no means organic, from scratch, local meals. But they are what we expect we'll want most: comfort food.
We already had the following meals in place just from leftovers last week:
Chicken Tikki Masala
Chicken and Vegetable Stew
Pot Roast with Veggies
(we also had a frozen, bacon-wrapped, chipotle cream cheese stuffed pork tenderloin my mom brought up for Easter from the Bellville Meat Market)
This is what we decided to make this weekend:
That's:
Chicken Spaghetti
Cheese Enchiladas w/ Rice and Beans
Smoked BBQ Pulled Pork
Bread Lasagna
Beef Burritos
Chicken and Dumplings
Taco Casserole
Veggie Meatloaf
King Ranch Chicken
Shrimp and Sausage Gumbo
I based this menu a little off of what we had in staples. I went to HEB for the rest. I also threw a few CPK frozen pizzas and flavor ice pops into the mix. We had the freezer space now, so why not? Not bad for over 2 weeks of food.
The first thing I did was to put our chicken in the slow cooker. I put in a bunch of breasts and thighs, along with onions, garlic, and broth to slow cook for about 8 hours. This is what we were using in the king ranch chicken, the chicken spaghetti, and the chicken and dumplings.
SHRIMP AND SAUSAGE GUMBO
The first meal up was the sausage and shrimp gumbo. We had some fresh shrimp left over from our "babymoon" down to the gulf that we froze. I used the gumbo recipe from America's Test Kitchen:
Ingredients
- 1 1/2 pounds small shrimp (51 to 60 count), shelled and deveined (if desired), shells reserved
- 1 cup clam juice (one 8-ounce bottle)
- 3 1/2 cups ice water
- 1/2 cup vegetable oil
- 1/2 cup all-purpose flour (preferably bleached)
- 2 medium onions , chopped fine
- 1 medium red bell pepper , chopped fine
- 1 medium rib celery , chopped fine
- 10 ounces frozen okra , thawed (if using fresh okra, trim the caps and slice the pods 1/4-inch thick)
- 6 medium cloves garlic , minced
- 1 teaspoon dried thyme
- 1 teaspoon table salt
- 1/4 teaspoon cayenne pepper
- 2 bay leaves
- 3/4 pound smoked sausage , such as andouille or kielbasa, sliced 1/4 inch thick
- 1/2 cup minced fresh parsley leaves
- 4 medium scallions , white and green parts, sliced thin
- Ground black pepper
Instructions
- 1. Bring reserved shrimp shells and 4 1/2 cups water to boil in stockpot or large saucepan over medium-high heat. Reduce heat to medium-low; simmer 20 minutes. Strain stock and add clam juice and ice water (you should have about 2 quarts of tepid stock, 100 to 110 degrees); discard shells. Set stock mixture aside.
- 2. Heat oil in Dutch oven or large, heavy-bottomed sauce-pan over medium-high heat until it registers 200 degrees on an instant-read thermometer, 1 1/2 to 2 minutes. Reduce heat to medium and stir in flour gradually with wooden spatula or spoon, working out any small lumps. Continue stirring constantly, reaching into corners of pan, until mixture has a toasty aroma and is deep reddish brown, about the color of an old copper penny or between the colors of milk chocolate and dark chocolate, about 20 minutes. (The roux will thin as it cooks; if it begins to smoke, remove from heat and stir constantly to cool slightly.)
- 3. Add onion, bell pepper, celery, okra, garlic, thyme, salt, and cayenne; cook, stirring frequently, until vegetables soften, 8 to 10 minutes (or 10 to 15 minutes if using fresh okra). Add 1 quart reserved stock mixture in slow, steady stream, stirring vigorously. Stir in remaining quart stock mixture. Increase heat to high; bring to boil. Reduce heat to medium-low, skim off foam on surface, add bay leaves, and simmer uncovered, skimming foam as it rises to the surface, about 30 minutes.
- 4. Stir in sausage; continue simmering to blend flavors, about 30 minutes longer. Stir in shrimp; simmer until cooked through, about 5 minutes longer. Off heat, stir in parsley and scallions, adjust seasonings to taste with salt, ground black pepper, and cayenne; serve.
This went pretty smoothly. I don't think I got my roux got quite to the color of a dirty penny, but I started to worry that it would taste burnt. I probably should have listened to my cajun buddy who said to always make it two shades darker than you're comfortable with. Here's the color progression
Yeah, they look the same to me too. But trust me, in person it looked darker. He's some pics of all the pretty colors in this dish:
All-in-all i think it turned out pretty good though. I also cooked some Texmati rice and froze a third of it to go with the gumbo later on. The rest would be for our Mexican rice later on. The thing that became crucial from here on out was MULTITASKING. While the gumbo was cooking I started the enchilada sauce and the taco meat for the casserole and burritos.
CHEESE ENCHILADAS
This recipe is really for enchilada casserole. It's one my mom always made growing up. It's definitely what by friend from Arizona called "white people Mexican food," but it's always been comfort food for me. Here's the basic recipe:
Ingredients:
For Sauce:
1/2 onion, diced
1 can of tomato sauce (16 oz.)
1 tbsp ground cumin
2 tbsp chili powder
1 tsp garlic powder
1 tbsp olive oil
1/2 tsp cayenne
salt and pepper to taste
For Casserole:
Shredded cheddar cheese
Flour tortillas
Green onions for garnish
Instructions:
Saute the diced onion until translucent in the olive oil. Then add the spices and incorporate it all over the onion. Then pour in the sauce and mix. Let simmer for 30 min to incorporate the flavors.
Ladle some of the sauce onto the bottom of a casserole dish. layer with tortillas, sauce, cheese until you get to the edge of the dish. Then top with green onions and bake at 350 for about 20-25 minutes.
Pretty simple, but pretty delicious. Here's the recipe for the rice that we froze with it:
Cooked white rice
1 tbsp ground cumin
2 tbsp chili powder
1 tsp garlic powder
1 tbsp olive oil
frozen corn
frozen peas
16 oz can of diced tomatoes
salt and pepper to taste
Mix all of this together and bake at 350 for 10-15 minutes
BURRITOS
This one doesn't need a formal recipe. While the sauce and gumbo was simmering, I cooked about 3 lbs of taco meat. I simply diced half an onion, sauteed it in a little oil, and browned all of the ground beef. After I made the enchiladas I ladled about a cup of the left over sauce into the beef and let it simmer fro about 10 minutes. We put some taco meat, some of the Mexican rice, some canned jalapeno Ranch Style beans, and some shredded cheddar onto flour tortillas, wrapped them in foil, and threw them in the freezer. That's about it for that one.
 |
| OK, I forgot to get a pic of us making the burritos, but here's Allison making me stop so she could clean some dishes before things got out of hand. |
 |
| Here's the final product. |
TACO CASSEROLE
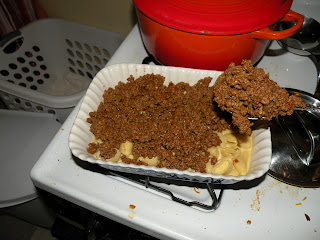
The next casserole on our list is an old favorite that my mom always made. Allison's come to love it too. It's pretty simple as well, so I'm not going to write out the recipe. You make your favorite shells n cheese and add some diced. pickled jalapenos and some of the brine from the jar. This adds some heat and some tanginess to the pasta. You put the shells n cheese on the bottom of a casserole dish and top it with taco meat. Bake at 350 for 15-20 minutes and you're done. This goes great with lettuce, tortilla chips, tomato salsa, and sour cream.
KING RANCH CHICKEN
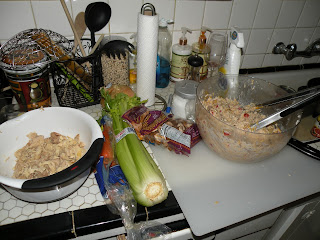
This is when I started to get tired, but the recipes were getting even easier. At the beginning of the day I put about 8 bone-in chicken thighs with skin and 4 skinless, boneless chicken breasts into the slow cooker. I added half an onion and three cloves of garlic, along with 3 cups of chicken broth. I let this cook all day until it was fall-off-the-bone tender. I would use all of this chicken for the next three recipes. I took all of the chicken out of the slow cooker, removed the bones, and cut/shredded it into small pieces. I saved about one third of it for the chicken and dumplings. The rest I would essentially prepare the same way for the chicken spaghetti and the king ranch chicken: Add sauteed onions rotel, cream of mushroom, and shredded cheddar. This doesn't sound like the tastiest thing in the world, but it's something Allison and I grew up with and always loved.
So for the King Ranch, I took one half of this roteled, souped, cheesed chicken and layered it in between flour tortillas in a casserole dish. I topped with a little extra cheddar and baked at 350 for 10-15 minutes until bubbling. Done.
 |
| Shredding all of the chicken for the next three recipes |
 |
| Adding the rotel and cream of mushroom |
 |
| Again, I forgot to take a pic when it was nice and hot. But here it is frozen. Mmmmm. |
CHICKEN SPAGHETTI
This dish is made almost the same as the above. You take the chicken mixture, add some sauteed, sliced mushrooms, and bake it with cooked spaghetti at 350 for 10-15 min. Done!
CHICKEN AND DUMPLINGS
This isn't actually the recipe that either Allison nor I grew up with. But it's something we've learned over the years, and it's pretty easy. I strained the broth that I made from cooking the chicken all day and returned it to the slow cooker. I heated it back up and added a mirepoix of onions, carrots, and sliced celery.
After those veggies softened I added frozen peas and sliced mushrooms. Once the stock was bubbling again I added canned biscuits. I just tore the dough into smaller pieces and dropped them into the liquid. I put the lid back on and let the dumplings cook fro about 30 min, or until they were no longer raw in the middle. Then I added that last third of chicken back in, let it heat through, and violla!
Before I went to bed that night I put the dry rub on the pork butt so it could marinate over night. So now we go to that recipe in DAY TWO.
SMOKED PULLED PORK
This recipe gave me the chance to use my new electric smoker. Because our place is a touch small, it's nestled outside on our side porch, right along side our new deep freeze.
So here's the recipe for the dry rub i put on the pork shoulder (which was about 3lbs):
Spice Rub:
1 teaspoon ground black pepper
1/2 teaspoon cayenne pepper
1 tablespoon chili powder
1 tablespoon ground cumin
1 tablespoon dark brown sugar
1 teaspoon dried oregano
2 tablespoons paprika
1 tablespoon table salt
1 teaspoon granulated garlic
1 teaspoon granulated sugar
1 teaspoon ground white pepper
 |
| Flavor Country. |
Then I rubbed this onto the shoulder and let it sit in the fridge overnight
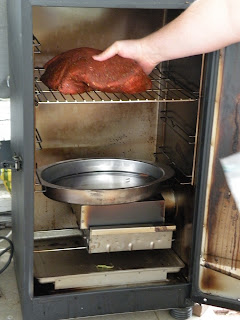
The next morning I put the shoulder in my fancy new smoker for 6 hours.
 |
| I added water to the pan below to help keep things moist. |
 |
| I like to use hickory chips (half dry and half soaked in water). |
 |
| Nice bark. |
After that I put it in the slow cooker with some bbq sauce and let it soak in a bit. Then I shredded the meat with two forks and it was ready to freeze.
BREAD LASAGNA
This is a recipe we got years ago from Lidia's Italy. It uses rustic bread instead of pasta and has fried eggplant in place of meat. Here's the recipe:
Ingredients:
3½ pounds medium eggplant
2 cups flour, for dredging
½ cup canola oil, for frying, or more if necessary
½ teaspoon salt, or more if necessary
2 tablespoons soft butter, for the baking pan
12 slices day-old country bread, from a 1 1/2-pound loaf
6 cups Tomato sauce
2 cups Grana Padano, or Parmigiano-Reggiano, grated
2 cups flour, for dredging
½ cup canola oil, for frying, or more if necessary
½ teaspoon salt, or more if necessary
2 tablespoons soft butter, for the baking pan
12 slices day-old country bread, from a 1 1/2-pound loaf
6 cups Tomato sauce
2 cups Grana Padano, or Parmigiano-Reggiano, grated
Directions:
Trim the stem and
bottom end of the eggplants. Peel off all the skin, if it is tough or,
with tender eggplant, remove ribbons of peel, in a striped pattern.
With a sharp chef’s knife, cut all the eggplant lengthwise into slices, about 1/3-inch thick. Toss a few slices at a time in the flour (in a large bowl or on a tray) to coat completely on both sides; shake off the excess and pile in another bowl or tray.
Pour 2 or 3 tablespoons of the canola oil into the skillet and tilt it so the entire bottom is coated with a thin film of oil. Set the pan over medium-high heat for a couple of minutes.
Lay a batch of eggplant slices into the pan with plenty of space between them. You want to brown the pieces quickly, with minimal oil, so keep the heat up but don’t let the oil smoke or the vegetables burn. Fry the slices for about 2 minutes until lightly colored on the underside, then flip them over and fry 2 minutes on the second side. Drain the slices on sheets of paper towel and sprinkle with a couple pinches of salt while hot.
Brown the remaining floured eggplant in batches, adding oil to the pan as needed. Remove to paper towels and salt them right away, using about 1/2 teaspoon for all the slices.
Assembling the Lasagna: Arrange a rack in the center of the oven and preheat to 400°. Cut the crusts off the bread slices. If they are soft and fresh, you can dry them briefly in the oven but don’t let them get crisp or brown.
Butter the bottom and sides of the baking pan generously. Spread a cup of the tomato sauce in a thin layer in the bottom of the pan. Cover the bottom with a single layer of bread slices. Trim the slices and cut them in pieces so they fit close together and lie flat (but you don’t have to fill every small crack or hole). Spoon about 2 cups of sauce onto the bread and spread it evenly.
Make a layer of zucchini (or sautéed eggplant), using half the slices. You can lay them crosswise or lengthwise in the pan, whichever way fits best. Overlap the slices as necessary to make an even layer that completely covers the sauce. Press down gently to condense the lasagna and make more room in the pan, then sprinkle 1 cup of grated cheese evenly over the top.
Now repeat the layering: Arrange another layer of bread slices and trimmed pieces. Cover the bread with 2 more cups of sauce, spread evenly. Lay out the rest of the zucchini (or eggplant) slices in an overlapping layer. Spread the remaining tomato sauce, about a cup, in a thin layer. Sprinkle another cup of cheese (or more!) in a generous layer over the top of the lasagna.
(I forgot to take a final picture of this dish. You can tell I was getting tired at this point.)
LENTIL LOAF
This was one of our favorite recipes back from my vegetarian days. It's from Giada De Laurentiis. It's a bit complicated, but well worth it. Here's the recipe:
Ingredients
Checca Sauce:
*
1 pint cherry tomatoes (about 2 cups, or 12 ounces), halved
*
3 scallions (white and pale green parts only), coarsely chopped
*
3 cloves garlic, chopped
*
8 fresh basil leaves
*
3 tablespoons olive oil
*
Pinch salt
*
Pinch freshly ground black pepper
Lentil Loaf:
*
3/8 cup lentils (about 5 ounces)
*
1 ½ cups reduced-sodium vegetable
broth
* ½ cup uncooked short-grain brown rice,
rinsed well
*
¼ cup finely chopped white onion
*
¼ cup shredded carrots
*
½ celery rib, sliced
*
¼ cup frozen corn kernels
*
1 tablespoon butter, divided
*
5 ounces fresh baby spinach leaves (about 4 cups)
*
¾ cup cubed whole milk mozzarella cheese, divided (about 8 ounces total)
*
1 egg, lightly beaten
*
1/8 cup freshly grated Parmesan cheese, plus 2 tablespoons
*
1/6 cup chopped fresh basil leaves
*
¼ teaspoon salt
*
½ teaspoon freshly ground black
pepper
*
½ tomato, sliced
Directions
For the Checca Sauce: Combine the cherry tomatoes,
scallions, garlic, basil, and oil in a processor. Pulse the tomatoes until they
are coarsely chopped, being careful not to puree. Set aside. Season the sauce
with salt and pepper.
For the Lentil Loaf: Place the lentils in a large saucepan
of cold water. Bring the water just to a boil over high heat. Carefully drain
the boiling water and rinse the lentils. Meanwhile, in a heavy large saucepan
over medium heat, bring the broth to a boil. Add the rice and return the liquid
to a boil. Decrease the heat to low, cover the rice, and gently simmer without
stirring for 10 minutes. Stir in the lentils, onion, carrot, and celery. Cover
and continue cooking without stirring until the rice and lentils are tender and
the liquid is absorbed, about 30 minutes longer. Turn off the heat. Sprinkle
the corn over the rice and lentils and let stand, covered, for 5 minutes.
Uncover and fluff the rice with a fork. Cover and let stand for 5 more minutes.
 |
| Easy as pie. |
Meanwhile, preheat the oven to 350 degrees F.
Spread 1 tablespoon of the butter over a 10 by 4 1/2 by
3-inch loaf pan. In a heavy, large skillet, cook the spinach over medium heat
until the spinach wilts, about 3 minutes. Drain and squeeze the excess liquid
from the spinach. Transfer the spinach to a work surface and coarsely chop.
In a large bowl, gently mix the lentil mixture, spinach, ½ cup
of the mozzarella cheese, egg, 1/8 cup of Parmesan cheese, basil, salt, pepper,
and half of the checca sauce. Spoon the mixture into the prepared pan. Arrange
the sliced tomatoes in a row over the lentil mixture. Sprinkle with the
remaining ¼ cup of mozzarella cheese and 1 tablespoon of Parmesan cheese. Dot
the top with the remaining ½ tablespoon of butter.
Bake uncovered until the loaf is heated through and the
topping is melted and starting to brown, about 30 minutes. Let cool for 15
minutes. Slice the loaf into 2-inch slices, arrange on plates, and serve with
the remaining checca sauce.
 |
| Here's a pic of the one that we ate that next night (we doubled the recipe). |
Well that's it. 10+ meals in two days. It should keep us fat and happy until we've got a handle on this child-rearing thing. I'll try to post updates on which dishes reheated best.
 |
| To recap |
 |
| The final fruits of our labor! |


